Git Integration and Version Control
Git Integration#
This article provides information about git integration support in Guzzle and what different git provider users can use in Guzzle and what git actions Guzzle have.
Guzzle supports GIT integration to enable code versioning which eventually also protects job definition from getting overwritten in case of concurrent development happening on the same Guzzle job in a shared development environment.
Guzzle provides two git provider supports
GitHub
Azure DevOps Git
note
Once GIT integration is enabled, user will not be able to update make any config change in GitHub
As a best practice the collaboration branch should have branch policy setup to prevent direct commit
Configured GitHub Repo#
GitHub is a development platform that allows you to host and review code, manage projects and build software alongside millions of other developers from open source to business.
You can now integrate Guzzle with Github. The Guzzle Git integration with Github allows you to collaborate with other developers, do version control, versioning of your Guzzle configs (activities, pipelines, datastores, batches).
Guzzle Git integration with Github allows you to use either public or private repositories belonging to individuals or organizations. Using an OAuth application to login to your GitHub account. Guzzle automatically pulls the repositories in your GitHub account that you can select. You can then choose the branch that developers in your team can use to do collaboration.
Integrating a git repository for your Guzzle installation will entail following:
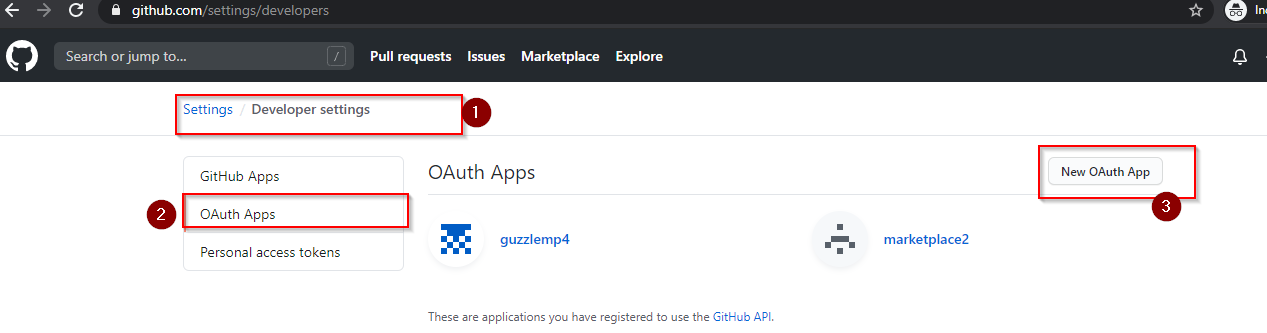
Step 1 : Registering OAuth application in GitHub
- For every Guzzle instance (or Guzzle installation) you will be required to register OAuth application in GitHub.
Enter all the required details namely:
Application name: guzzle-dev
Home Page: https://guzzle.asia.cloudapp.azure.com:8082/
Redirect URL : https://guzzle.asia.cloudapp.azure.com:8082/integration/git

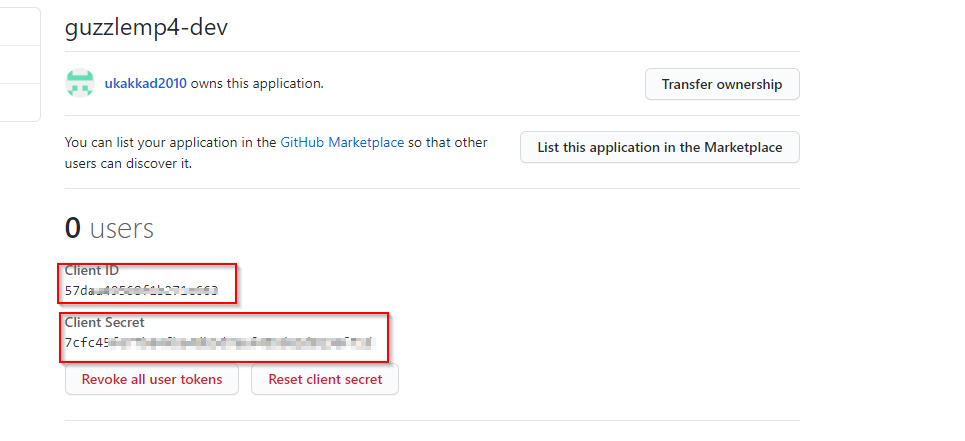
- Once Application is registered, GitHub shall provide you the details of Client ID and Client Secret.
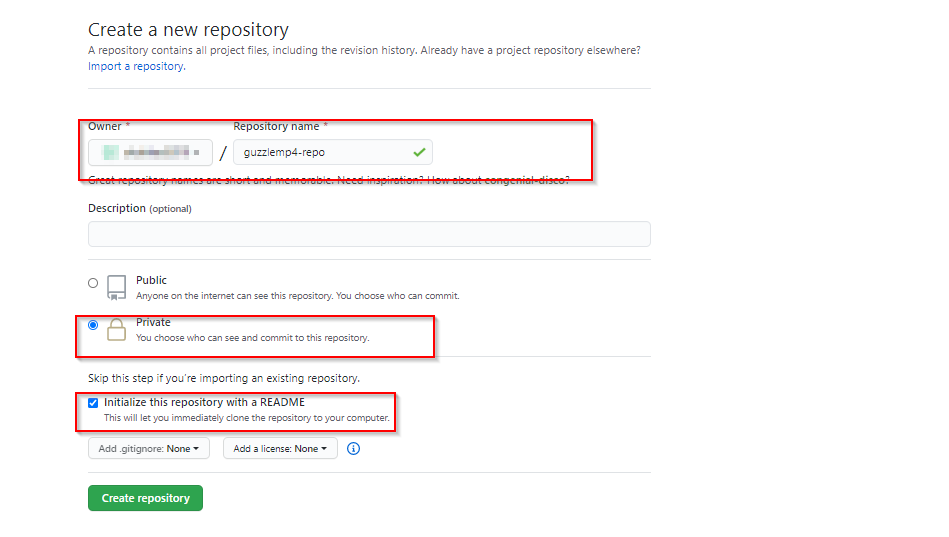
Step 2: Creating the repository
You can create a repository in GitHub or use an existing repository.
The repository can be created under individual's account or organization
Guzzle supports both private and public repositories
To create a repository, login to GitHub account, go to Repositories and click New. Ensure the repository is initialized.

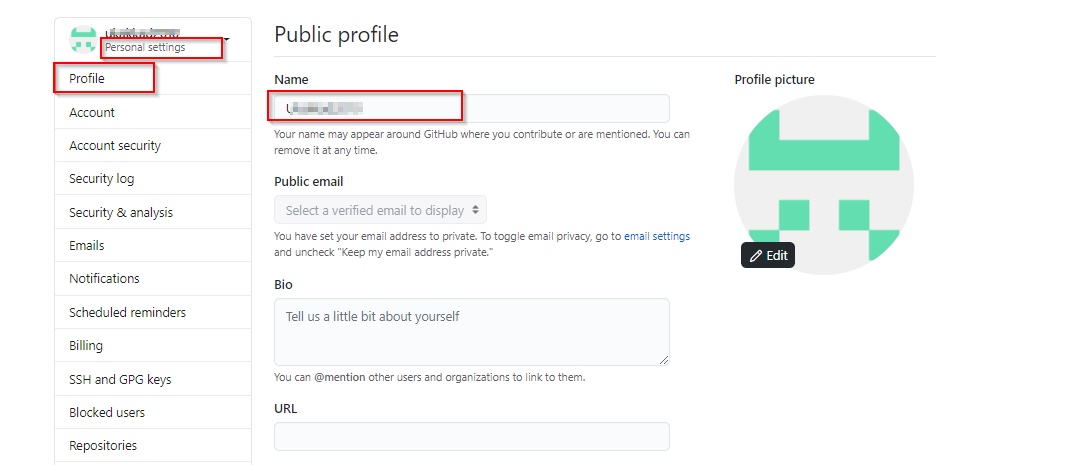
- Also ensure that user account that shall be used to integrate git with Guzzle should have "Name" defined in public profile:

note
This repository can be either in the same user or organization as the OAuth Application or not. Both OAuth and repository are independent component of the setup
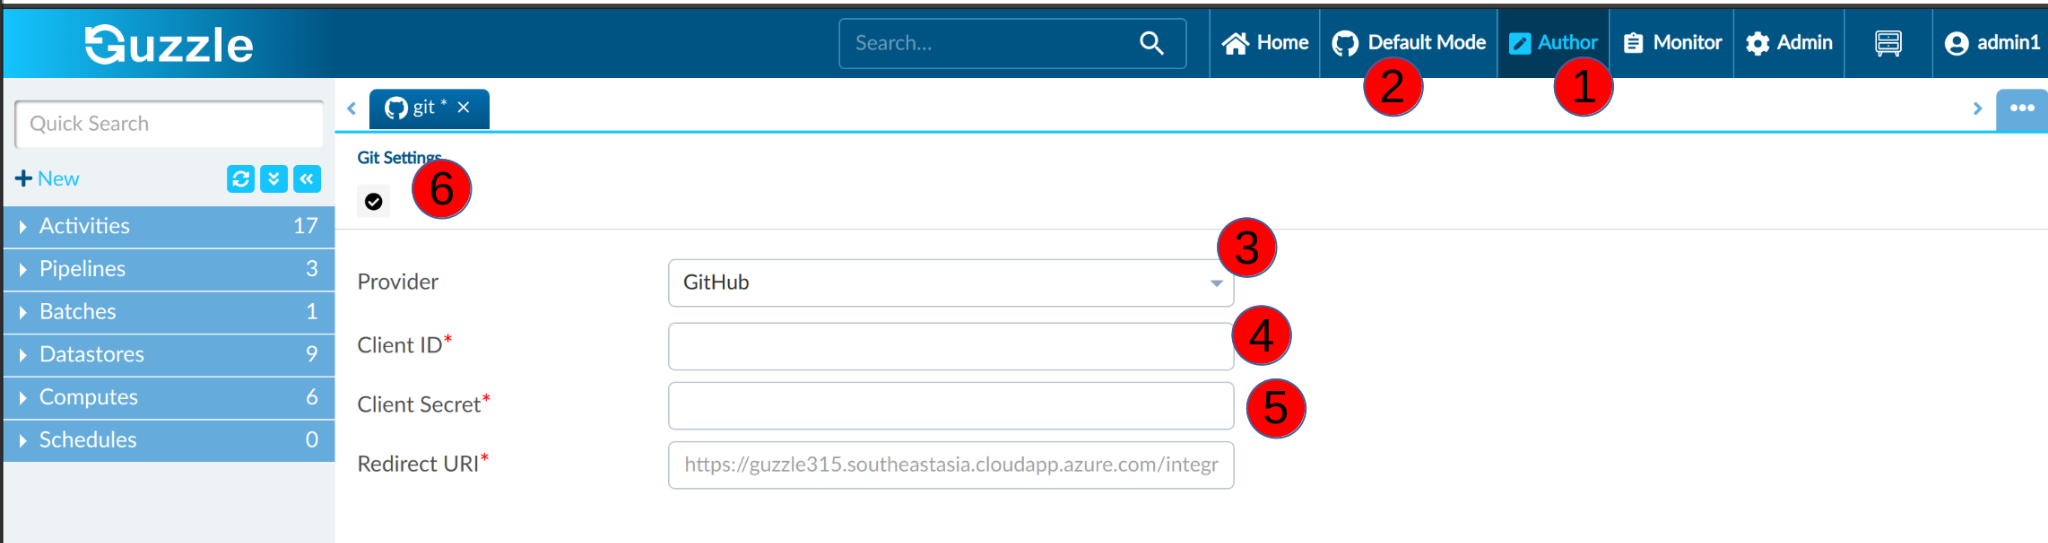
Step 3 : Integrating GitHub with Guzzle Git Integration
Login to Guzzle
Goto Author tab from top navigation bar
Click on Default Mode
Choose the provider as GitHub from dropdown
Enter the Client Id and Client Secret And Click on Enable
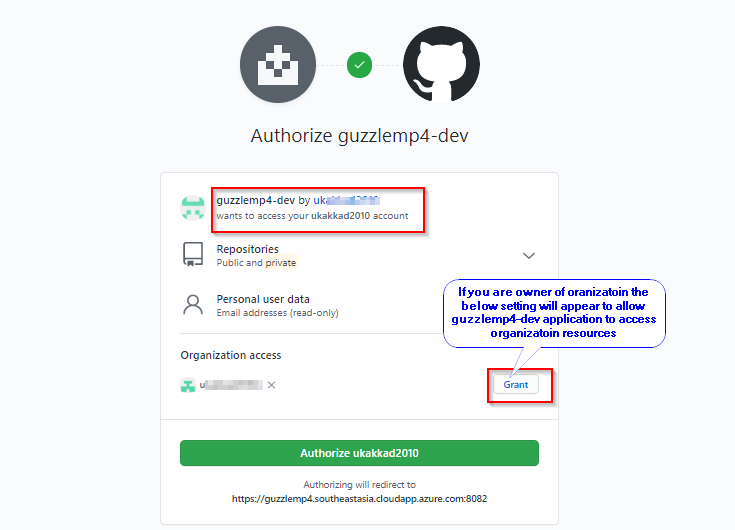
- This will redirect you to login to GitHub and authorize the OAuth application: guzzle-dev to be able to access the public and private repositories in your account (personal repository) or those owned by your organization. Permit this access

- After OAuth flow (authorization), you will be directed to Guzzle. Enter the repository owner (this could be an individual's account or organization) and tab-out. This will pull a list of repositories that are accessible under that owner.
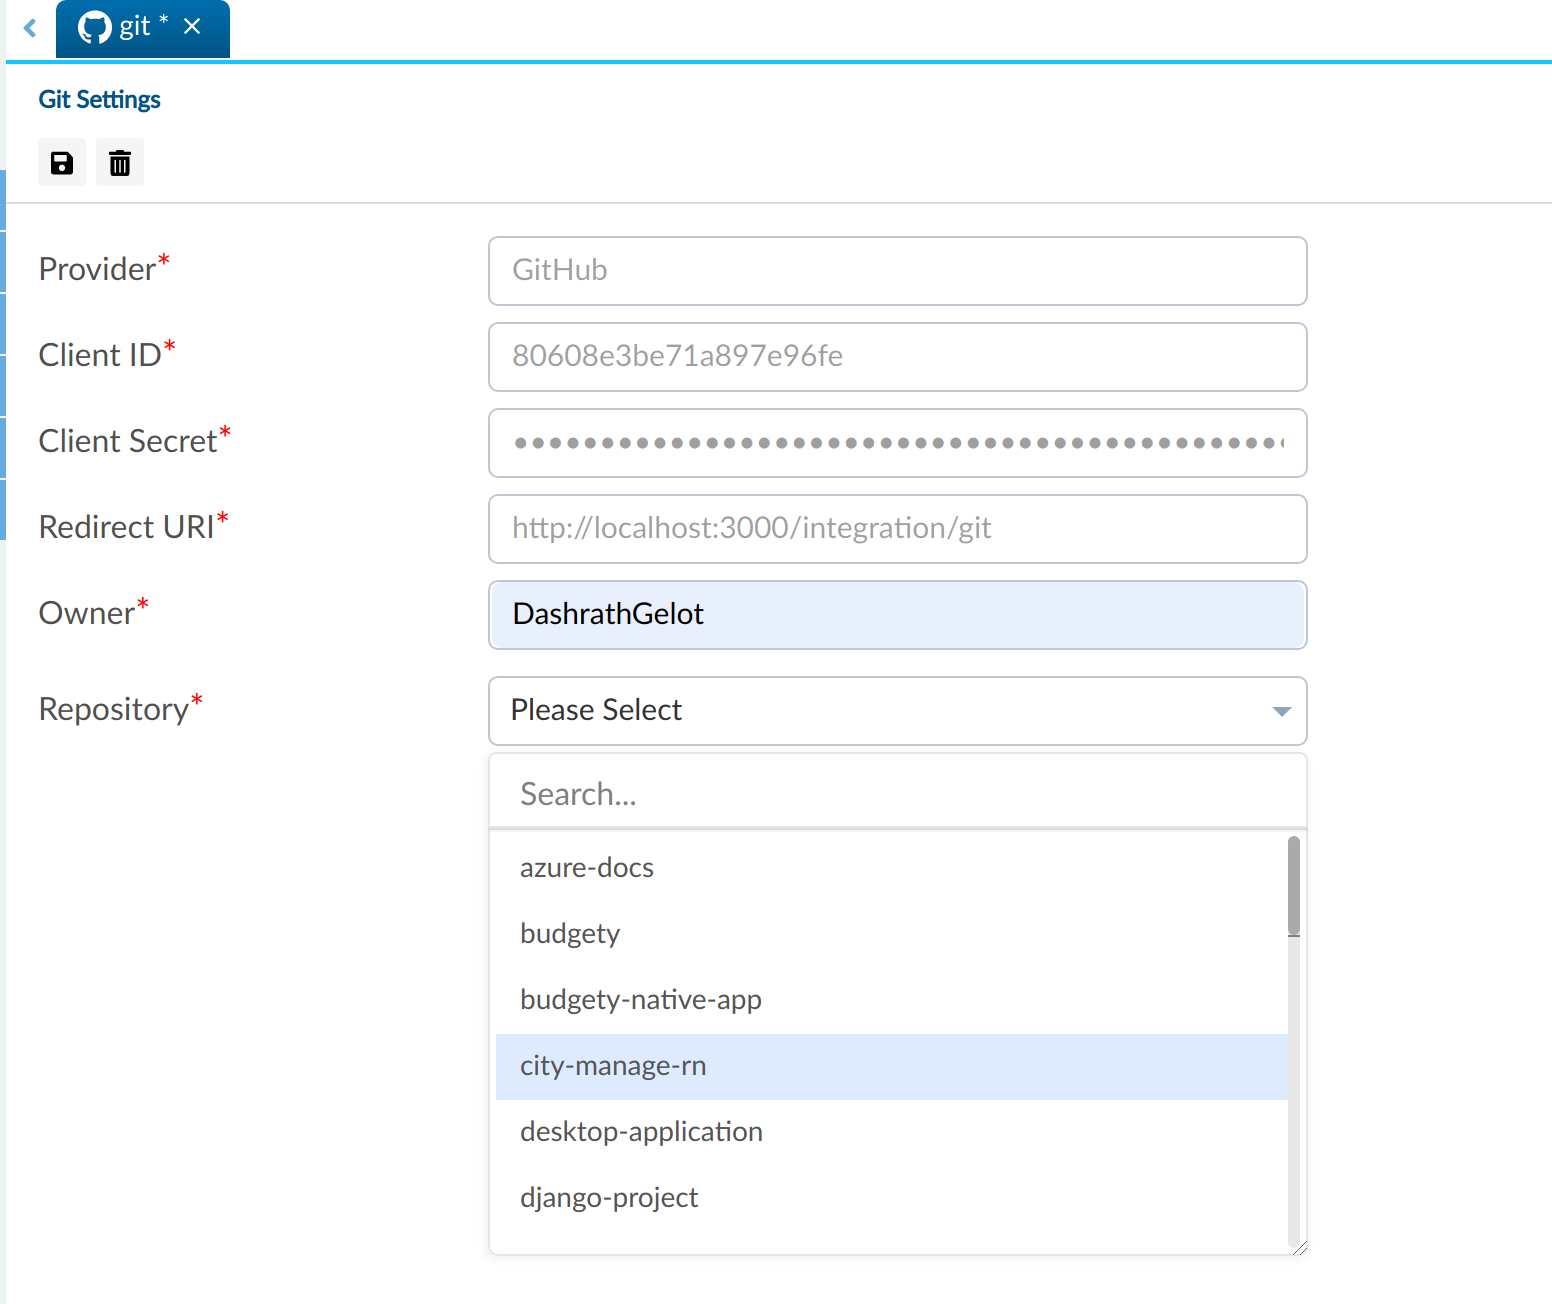
- After you select a repository, Guzzle will prompt you to select the Collaboration branches to be used. Once done click on Save icon to save.
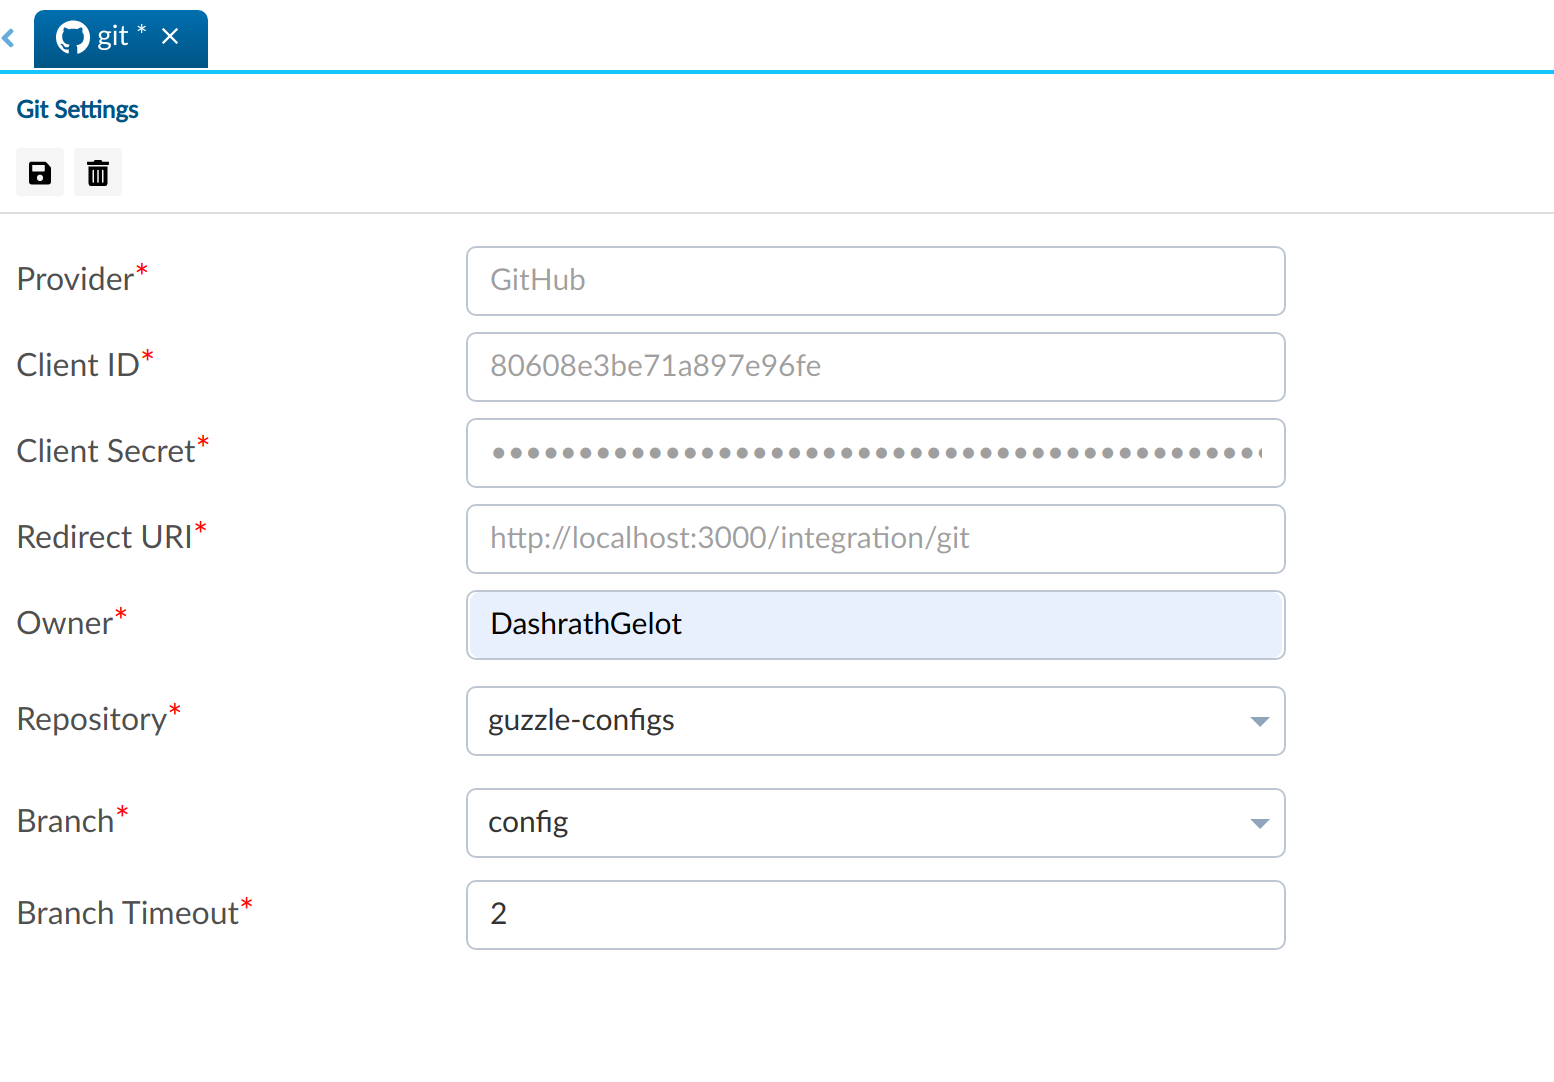
- Once enabled you will notice in top navigation bar, Guzzle shall show Git setting option on Top navigation bar
- Also Guzzle will commit all the existing configs into the GitHub repository and you should see the following folders showing up in the repo. Do take note that Guzzle will only clone the files in $GUZZLE_HOME/conf/default configs (which does not include spark, physical end point and schedules)
Configured git for Azure DevOps Git#
Guzzle with Azure Repos Git integration supports version control and collaboration for work on your Guzzle configs. You can associate a Guzzle with an Azure DevOps Git organization repository for version control, collaboration, versioning, and so on.
For configured Guzzle with Azure DevOps Git users need single sign on required.
User have to give below permissions for azure devops account from microsoft authentication application
Azure DevOps (guzzle will use on git integration with azure devops git)
Azure Service Management (for getting user profile detail)
Integrating a git repository for your Guzzle installation will entail following:
Step 1: creating the project and repository in Azure DevOps account.
Step 2: integrating Azure DevOps Git with Guzzle.
Login to Guzzle
Go to Author tab from top navigation bar
Click on Default Mode
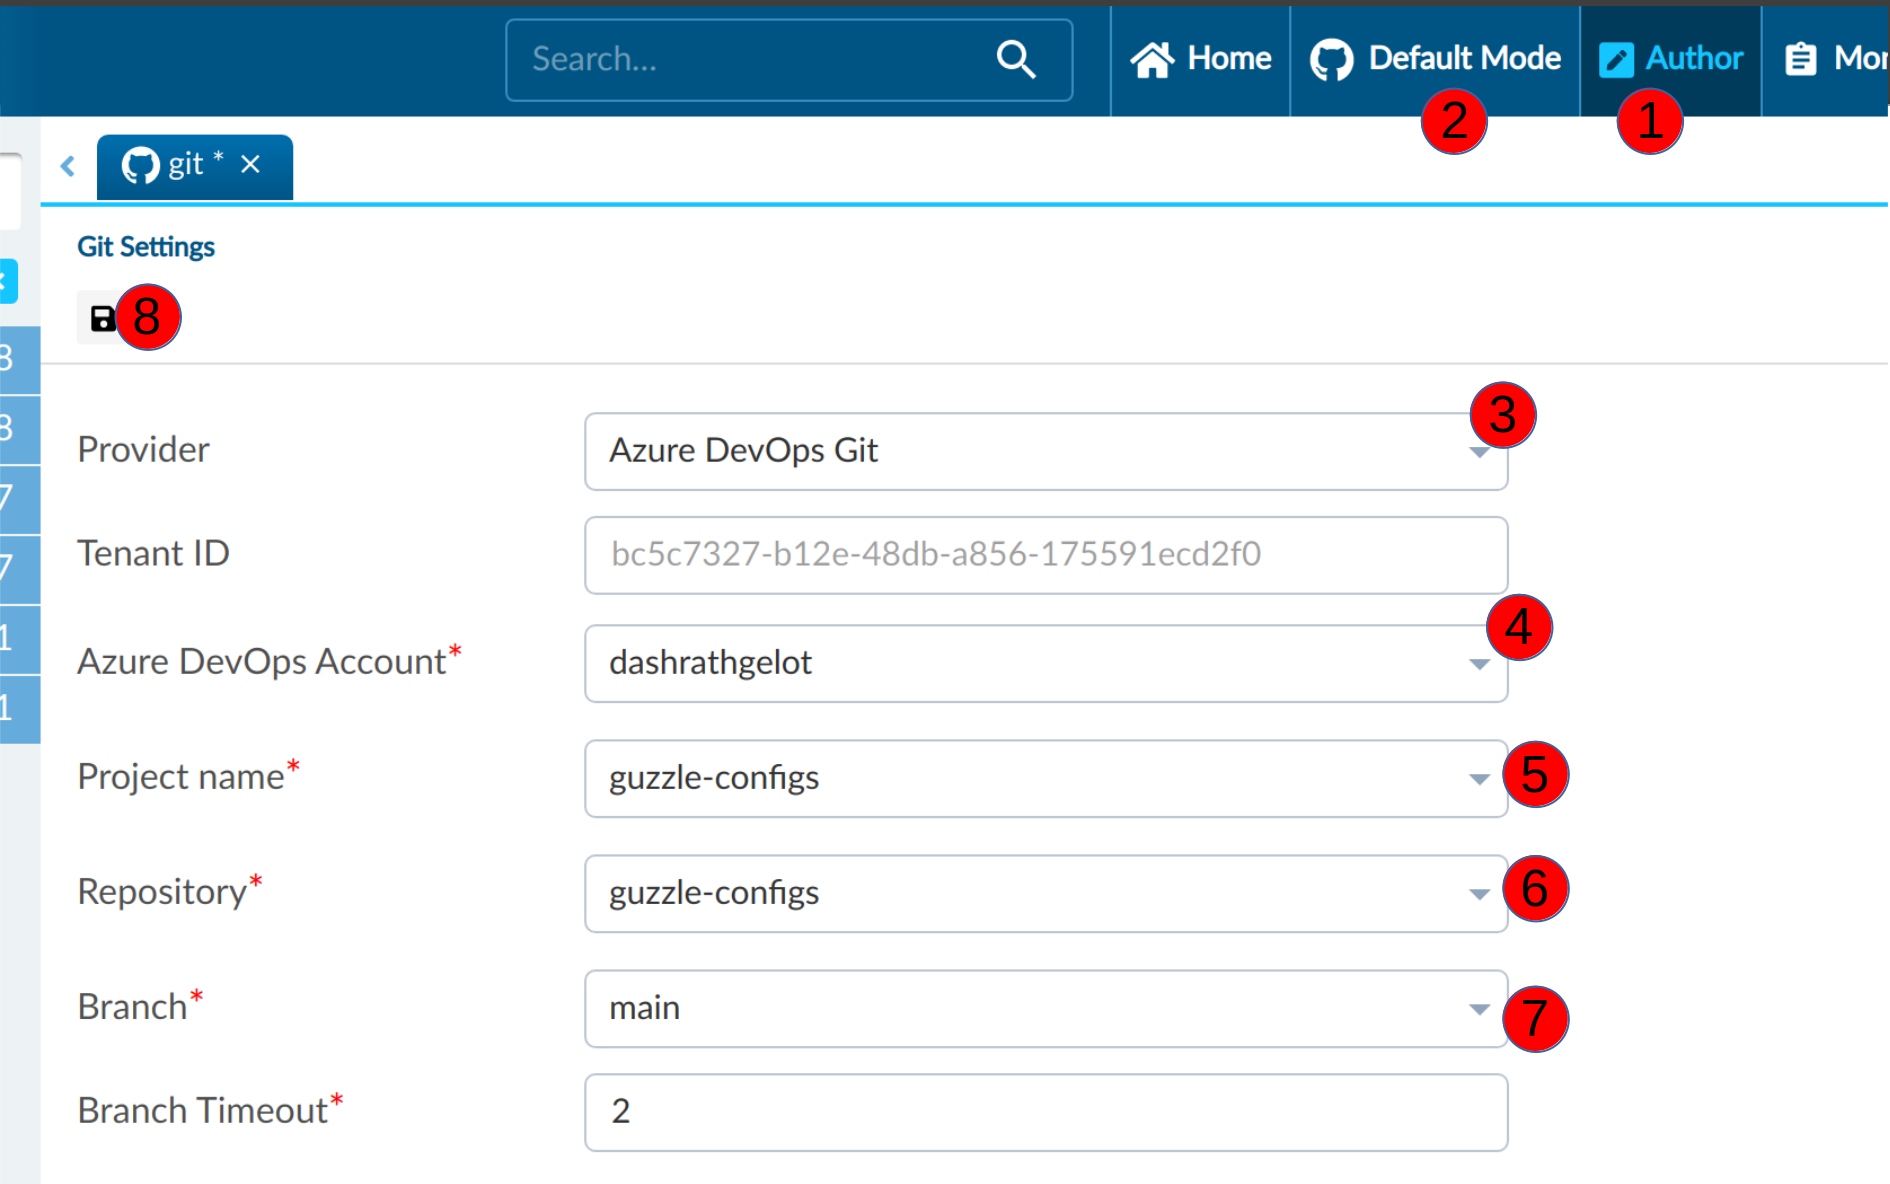
Choose the provider as Azure DevOps Git from dropdown
Guzzle automatically pulls a list of tenants from your sso credentials.
Guzzle automatically fetches a list of azure devops accounts belonging to selected tenants. Select Azure DevOps account from dropdown.
Select project name, repository name and branch name and click on save to integrate Azure DevOps.
Version Control#
Guzzle only version control following items:
- Activities
- Pipeline
- Batches
- Data stores
- Processing Templates
Following are not part of version control:
- Connection information and env mapping
- Compute
- Schedules
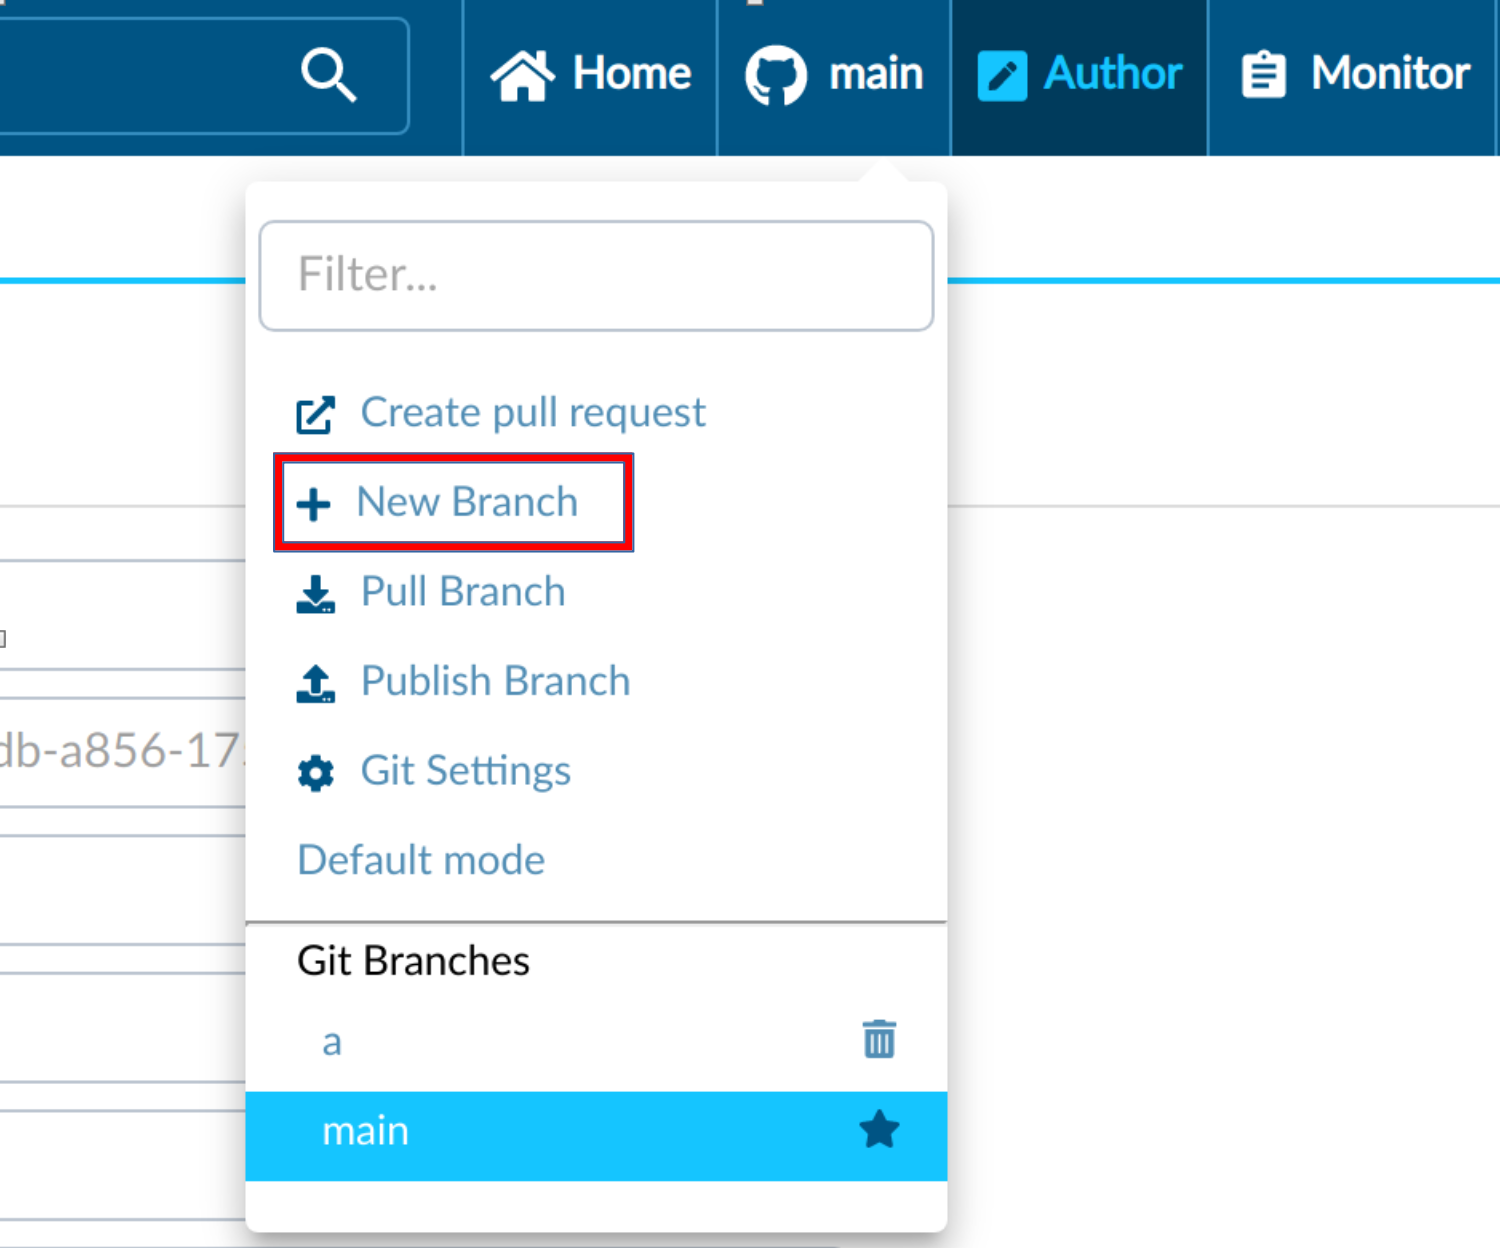
Creating new branch#
Each Git repository that's associated with a Guzzle has a collaboration branch. (main) is the default collaboration branch. Users can also create feature branches by clicking + New Branch in the Top Nav Git dropdown. Once the new branch Dialogue appears, enter the name of your feature branch.
Publish Branch#
After you have merged changes to the collaboration branch (main is the default), click Publish to manually publish your code changes in the main branch to the Guzzle default configs.Users can publish branches by clicking Publish Branch in the Top Nav Git dropdown.

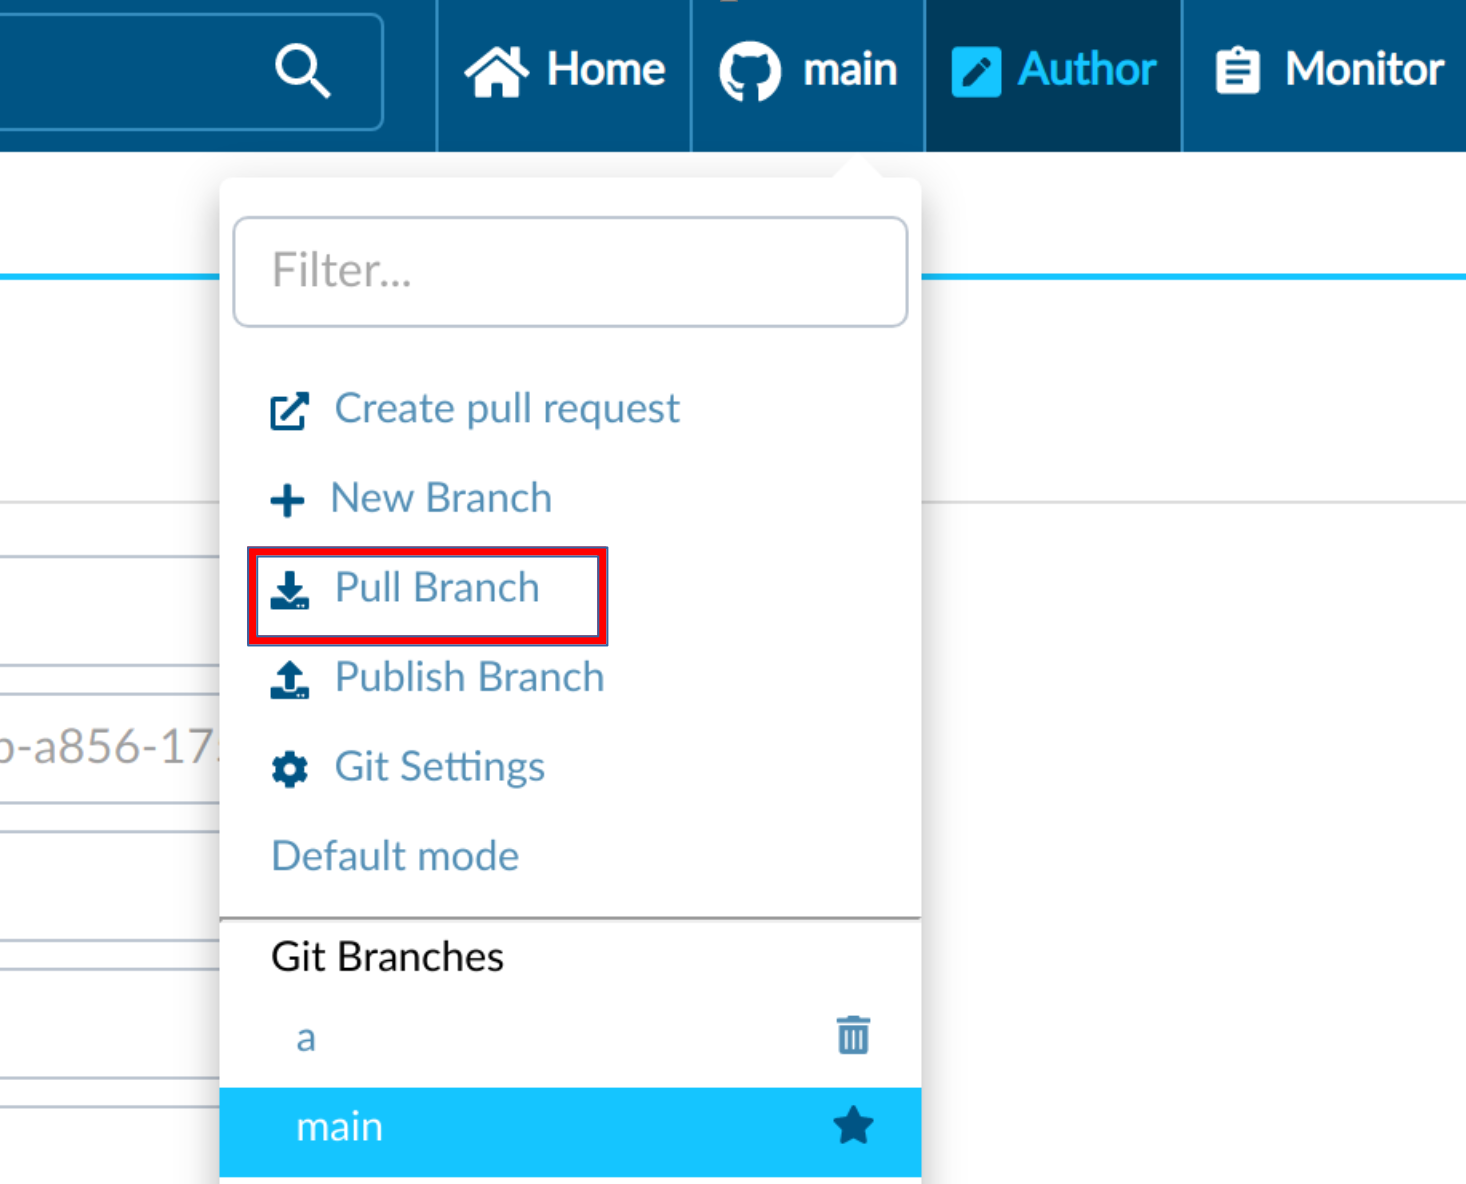
Pull Branch#
Users can manually pull branches by clicking Pull Branch in the Top Nav Git dropdown. To get the updated version of the branch from git repo
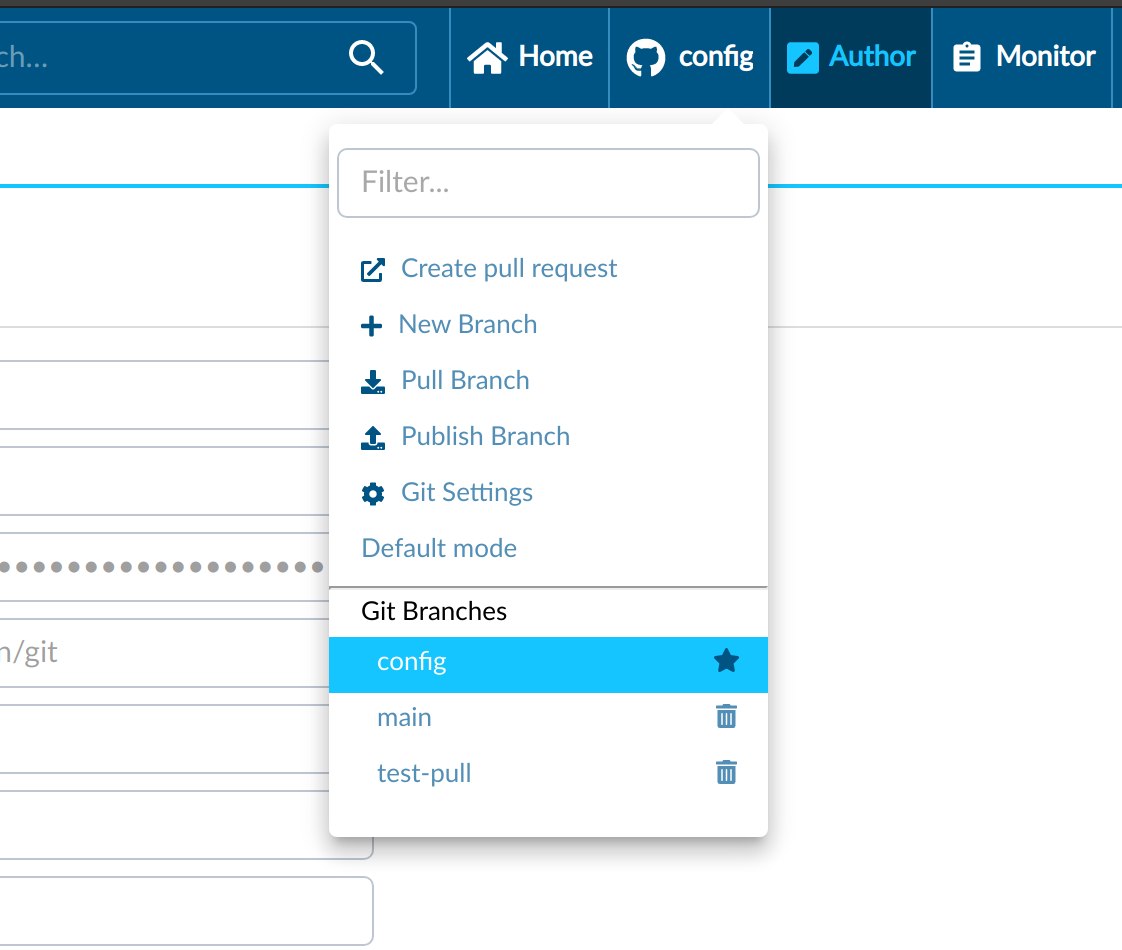
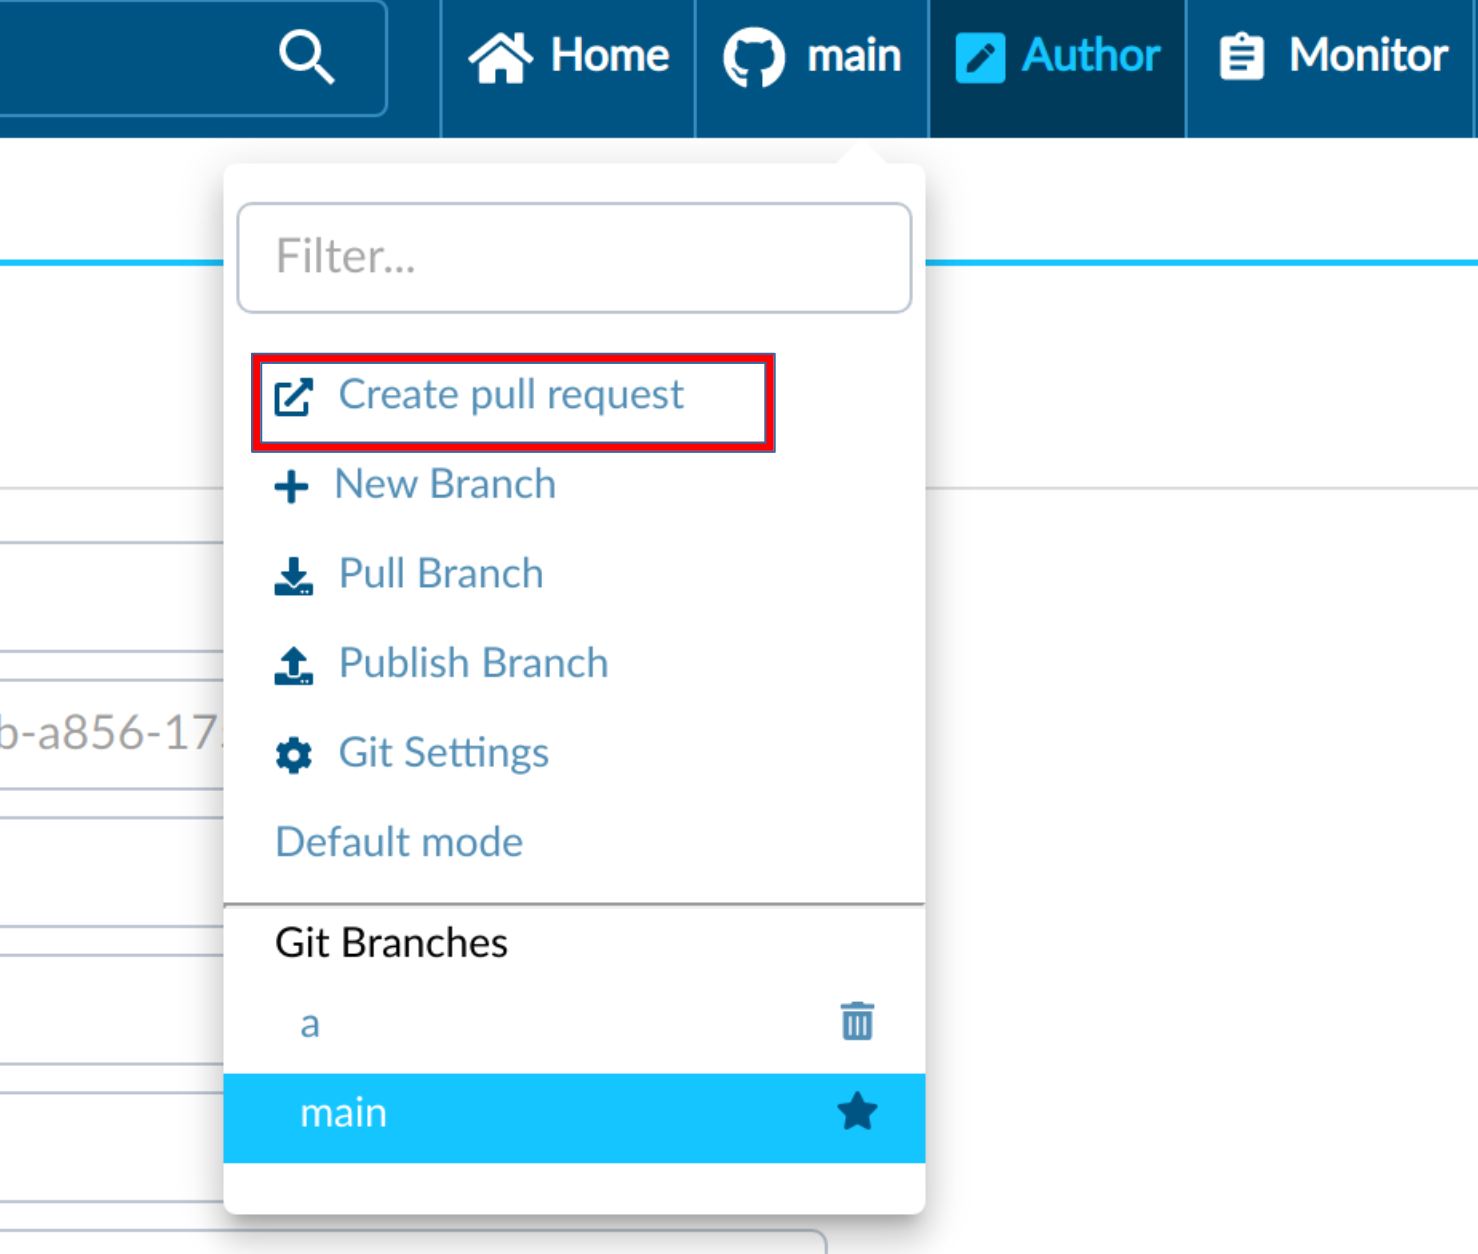
Create Pull Request#
Users can manually create pull Requests by clicking Create pull request in the Top Nav Git dropdown. This will show appropriate merge request UI of GitHub or azure devops
Switch to a different Git Provider#
To switch to a different Git Provider, go to the Git Settings from the Top Nav bar. Click on Remove
( ) of the tab bar.
Commit and Push#
For every action which requires updated configs to be saved in git, Guzzle takes the latest changes first and puts incoming changes on top of the current changes.
Custom Git Commit Message#
Once Users do git integrations every time when some config was changed, guzzle prompts the user to enter a custom git commit message if the user leaves as empty then by default guzzle takes some internal git commit message.